Active Directory GPO - Roaming Profiles
Microsoft Documentation
Introduction
A roaming user profile is a file synchronization concept in the Windows operating system that allows users with a computer joined to a domain to log on to any computer on the same domain and access their documents and have a consistent desktop experience, such as applications remembering toolbar positions and preferences, or the desktop appearance staying the same, while keeping all related files stored locally, to not continuously depend on a fast and reliable network connection to a file server.
Install Microsoft RSAT Tools
Install Microsoft RSAT tools to your workstation:
Log in to Windows with an administrator account.
Open the Settings app by pressing WIN+I.
Click Apps in the Settings app.
On the Apps & features screen, click Manage optional features.
On the Manage optional features screen, click + Add a feature.
On the Add a feature screen, scroll down the list of available features until you find RSAT.

After a few minutes, the RSAT tools you selected will be installed on your device.
Create Storage in the Uplevel Portal
Navigate to the Uplevel Portal > Storage section.
Click on the + icon to add a new File Share.
The share will automatically map to domain with “Authenticated users” permissions, which is equal to “Everyone joined to the domain”
 Domain objects must be uniquely named . As an example, if you name the share: “Roaming_Profiles”, only this domain object may use that name.
Create the GPO
Open the Group Policy Management Console as a user that is a Domain Administrator

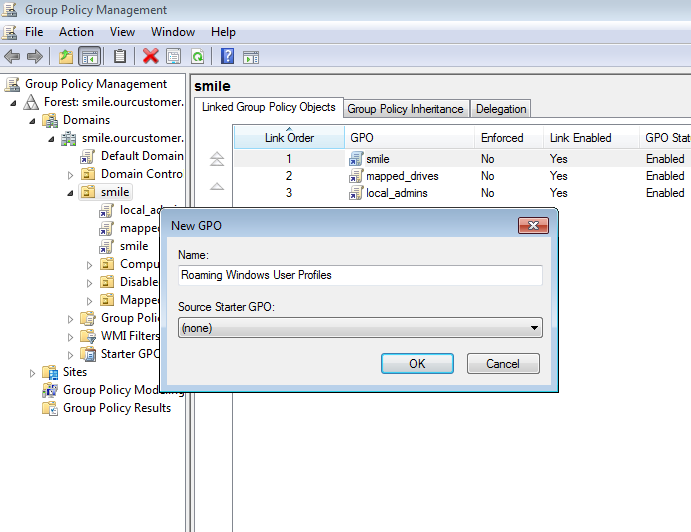
Right-click to your AD domain and select Create a GPO in this domain.
fEnter a name for the GPO, such as “Roaming Windows User Profiles”. The new GPO is shown below the domain entry.
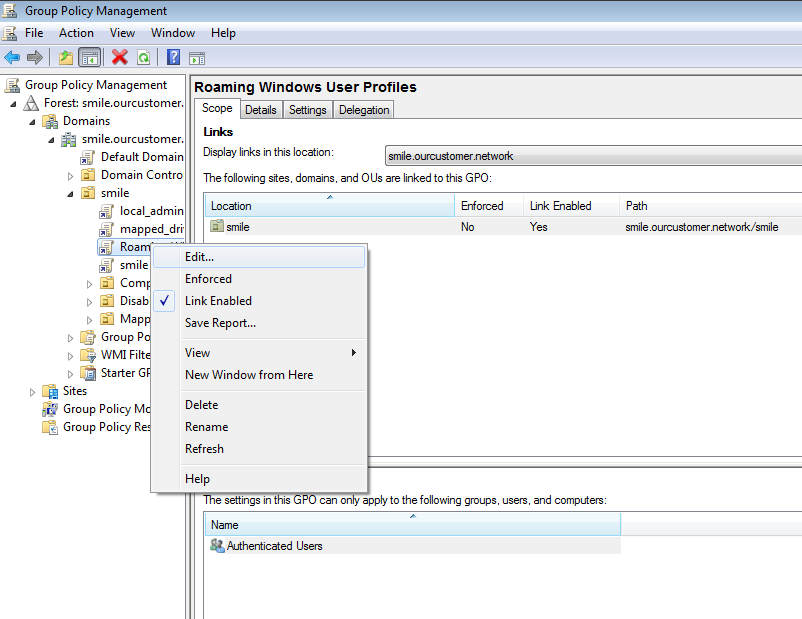
Right-click the newly-created GPO and select Edit to open the Group Policy Management Editor.
Navigate to Computer Configuration > Policies > Administrative Templates > System > User Profiles.
- Double-click the Set roaming profile path for all users logging onto this computer policy to edit:
Enable the policy and set the profile path. For example: \\server\profiles\%USERNAME%
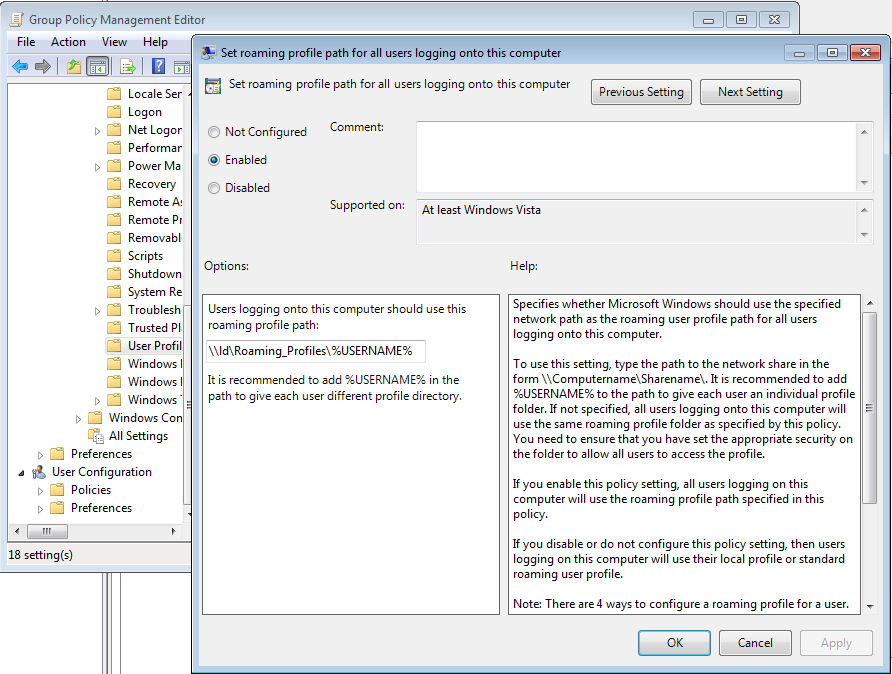
Windows replaces the %USERNAME% variable with the user name during login. Set the path without trailing backslash.
Setting up a Group for multiple users


At the Group Policy Management Editor remove “Authenticated Users” and add a newly created group.

Next, assign desired computers to the roaming group.
Open “Active Directory User and Computers”.
Find the group “roaming” right-click and select “Properties”. Click “Object Types” to show computers and add them.
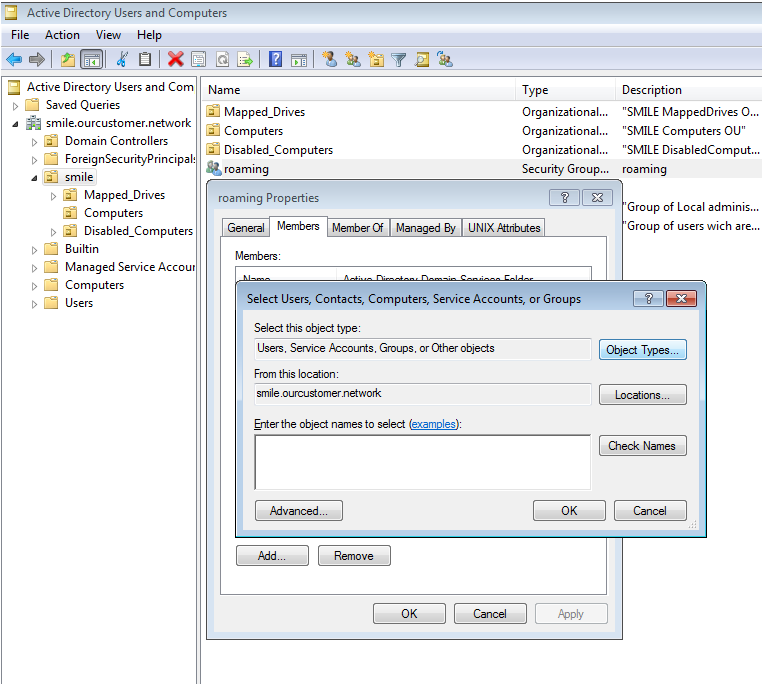
Click “OK”, “Advanced” and “Find Now”.

Close the Group Policy Management Editor and Active Directory User and Computers.
The GPOs are automatically saved on the Sysvol share on the domain controller (DC).
Force Update Group Policies
If you need to make the change right away, use the following shell command to start the updating process: gpupdate /force
This command compares the currently active GPO to the GPO on the domain controllers. If there has been no change since the last time the GPO was applied, the GPO is skipped. When the GPO updates:
- PS C:\gpudate /force
- Policy Revision...
- The update to the User Policy has been completed successfully.
- The computer policy update was successful.
Legacy Operating System Information
In addition, depending on the operating system version, Windows creates separate profile folders for each user in order to support Windows version-specific features. Profiles in Version 2 and later append the.V* suffix to the user's profile folder.
Here are the following Windows profile versions:
Related Articles
Active Directory GPO - Folder Redirection
Microsoft Documentation https://learn.microsoft.com/en-us/windows-server/storage/folder-redirection/folder-redirection-rup-overview If you deploy roaming user profiles with folder redirection in an environment with existing local user profiles, ...Domain Controller (Active Directory) Setup
Introduction There aren't any guidelines or instructions on the functioning of the Uplevel Domain Controller because it acts essentially identically to a conventional Microsoft Domain Controller from the standpoint of workstations. Microsoft offers a ...Active Directory - Export Microsoft Domain to CSV File
How to Export User Accounts Using Active Directory Users and Computers You'll be happy to know you can easily export all Active Directory information through the GUI ADUC or with a Powershell script. You only need to open ADUC, navigate to your ...Azure vs. Uplevel Active Directory
Portions of this article are from the Blog post on our website - https://www.uplevelsystems.com/blog/uplevel-ad-vs-azure-ad-whats-the-difference Introduction On-premises Microsoft Active Directory, Uplevel Active Directory compatible Directory ...GPO - Drive Mappings
As clients retain more data in the cloud, on-prem drive mapping remains a common strategy. Network drive mapping allows you to rapidly access files and folders located on network drives and servers. Drives in Windows can be mapped using a Group ...